∴ jay toups ∴
> > caged theory explained and applied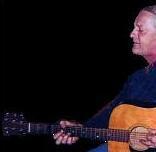 |
| [links] |
|---|
| :: myo bio |
| :: listen |
| :: friends & associates |
| :: caged guitar |
| :: radio paradise |
| :: folk alley |
| :: dirty linen |
 |
|
"A song can racket down through the ages. It doesn't corrode. It doesn't have to be polished, maintained, oiled, shelved or put in a vault. A song is far more powerful than any blaster ever invented."
L. Ron Hubbard |

|
:: 6.29.2007 ::
Welcome to Yet Another Web Page on CAGED theory. (If not one of the first.) I taught guitar in Salt Lake City, Utah for many years and hammered out a lesson from CAGED Theory in the mid 1980s to help my students learn fingerboard mechanics faster and better. I'd never heard of CAGED prior to that, so I gave the method an obvious-sounding name, which turned out to be in wide use by other teachers and players. Of course, you could also say I was living under a rock...
I'm not taking credit for CAGED theory, just this "lesson wrapper" around it. That and if you came here from a Google search for CAGED theory, this page is the first link. Wow, something I've done is #1 worldwide, has to do with music, is non-polluting...and it's free. If anyone has information about CAGED theory before 1990, please let me know. (Thanks to Shawn Kipfer for pointing out Bill Edwards' books on the subject, from 1983!)
Noteworthy observation:
Everything you need to know about using CAGED is on this page. However most novice and intermediate guitar players require 1 to 2 hours of instruction (i.e., keepin' it real) to understand and retain what is presented on this page. So if you get CAGED just by reading the text, studying the examples and applying them to your guitar, great! If not, contact me, I can help!
"EVERYTHING CLICKED! Well, almost everything, but the lessons and the practices finally fell together in that one mystical moment of pseudo enlightenment. Now, if I just had a spare lifetime to work on it. Ah, well, therein lies the new challenge."- Eric Reynolds, Salt Lake City, Utah
CAGED theory is a simple and intuitive, touch-based roadmap to the guitar. I have taught this method for more than 20 years to many guitar players of all abilities. It is proven to work for any player who can understand the fundamental premise, practice it, and apply it to their technique and repertoire. For both reading and non-reading players, CAGED theory can increase your chord vocabulary five-fold in about two hours. By touch. That's just the start. Playing melodically and improvising in any key comes if you stick with it.
So let's get started...on the far right------------>
D shape E shape G shape A shape C shape
Playing the five major chord inversions in the key of C uses "transposed" first position chord shapes, notated as follows:
C1 shape: X32010
A2 shape: x3555X
G3 shape: 875558
E4 shape: 8.10.10.988
D5 shape: XX10.12.13.12 "." is used for clarity.
In the key of C, the shapes begin on fret numbers as follows:
3rd (1st position of C), 3rd (2nd pos. of C or the "A" shape, 8th (3rd pos. of C, the "G" shape, 8th (4th position of C, or "E" shape, and finally frets 10th-13th for the "D" shape of C.
Once you figure out the "spans" between the shapes it is relatively simple to transpose CAGED to any sequence and any key.CAGED theory has the following elements and requirements:
Grab your guitar and get started now
- A 5-letter mnemonic spelled CAGED, signifying the 5 first-position major chord "shapes": C,A,G,E,D.
- The ability to play these chords using the "back" of the hand, i.e., using the middle, ring and pinky instead of index, middle, ring.
- Your ability to discern these 5 "shapes" regardless of where on the fingerboard or key they appear.
- The ability to play C, A, G, E, D chords in the first position...but with one IMPORTANT difference: using the back of your hand as in the pictures. (But unlike the picture, which shows the C cadence of CAGED, make sure you can play all 5 chord shapes in the first position with the back of your hand first. This is the baby steps part!)
- Try it! Use your "back" three fingers (m,r,p) to finger the garden-variety C chord in the first position. (The option to use the normal fingering when playing in the first position is still yours.)
- If this is doable, try playing an A chord in the first position, with the "back" three fingers (m,r,p) of the hand in the first position.
- Okay, great, now try a back-of-the-hand G chord in the first position. (No whining, please.)
- Next, play a first-position E chord with the "back" of the hand. You're getting the picture. The E chord reveals your now-extra index finger has nothing to do for now except to come to rest directly on the nut of the guitar neck. (Keep your eye on this one. Think of your index finger as a movable nut, you nut!)
- Lastly, the D chord, played in the first position and using the middle, ring, pinky fingers finishes the first part of understanding how CAGED works. This one's the one that'll give you fits, yet produce some of the best results. Make sure the tip of your index finger rests on the nut, and directly over the D or 4th string.
Ready for the magic dust? HERE IT IS: By playing these first-position C,A,G,E & D chord shapes in the proper sequence (and with the back of the hand), you're getting ready to take the next step: Into the CAGED Cadences.
Cadence 1: 5 Shapes of C
How you'll play 5 shapes (voicings) of a C chord: Begin with fingering the first-position C shape, A shape, G shape, E shape, and D shape. (That's the meditation you'll need in order to do this in any key.) Start CAGED Theory with the C chord. If you finger the 5 shapes correctly, the root note of the chord (underneath your straining pinky, ring or index finger) is always going to be a C note.
The sequence of 5 shapes of C chords, beginning with 1st position C chord (from right to left).
Begin again. C (or 1) shape of C, A shape of C, G shape of C, G shape of C, E shape of C, D shape of C.
- In the key of C, the first occurence of C major is the "1" position. It is the 5th frame in the picture (last one on the right).
- The "2" position of C major is the A shape. (4th frame)
- The "3" shape is G. Notice that by addressing all instances of the shapes with the back of the hand, the root note(s) are maintained.
- Next, play a "4" shape. In CAGED Theory, that's a, uh, E shape.
- To finish, move to the final, logical shape, D. (Use the mnemonic!) After you've figured out how to easily finger the D shape (5th position) of C, from frets 10-13, stop and take a couple of deep breaths.
- In the key of C, the first occurence of C major is the "1" position.
- The "2" position of C major is the A shape.
- The "3" shape is G. Notice that by addressing all instances of the shapes with the back of the hand, the root note(s) are maintained.
- Next, play a "4" shape. In CAGED Theory, that's a, uh, E shape.
- To finish, move to the final, logical shape. (Use the mnemonic!) After you've figured out how to easily finger the D shape (5th position) of C, from frets 10 - 14, stop, take a couple of deep breaths and shake out that fretting hand.
Start at right : 5th position.......4th position.......3rd position........2nd position.....1st position "C"
Begin again. C shape of C, A shape of C, G shape of C, E shape of C, D shape of C. What's that spell?
Cadence 2: 5 Shapes of A
From here, it's simple to go through the rest of the mnemonic, as in 5 shapes of A, G, E, D. Think of it as a chording circle that begins with whatever key you're playing in. Let's take the key of A. Each time you choose a basic chord, in this case, A, that becomes the first letter of the mnemonic: just think "AGEDC" by forming the first position of an A chord and beginning there. That's A (or 1) shape of A, G shape of A, E shape of A, D shape of A, and finally, C shape of A. Follow?
Cadence 3: 5 Shapes of G
"GEDCA" by forming the first position of an G chord and beginning there. That's G (or 1) shape of G, E shape of G, D shape of G, C shape of G, and finally, A shape of G.
Cadence 4: 5 Shapes of E
"EDCAG" by forming the first position of an E chord and beginning there. That's E (or 1) shape of E, D shape of E, C shape of E, A shape of E, and finally, G shape of E.
Cadence 5: 5 Shapes of D
"DCAGE" by forming the first position of an D chord and beginning there. That's D (or 1) shape of D, C shape of D, A shape of D, G shape of D, and finally, E shape of D.
What about F and B Chords?
Playing in the keys of F and B is simple if you understand the first five shapes. For example, F chords use the EDCAG cadence (E shape), except transposed up 1/2 step, or 1 fret. B chords use the AGEDC cadence and begin with an A shape transposed up 1 full step, or two frets. Simply start at the right fret and go through the 5 shapes for each and you'll quickly add them to your arsenal of great sounding chords.What about Minor Chords?
There is no difference in how the cadences work; just substitute the minor chord forms and move through the 5 shapes of, say, Em. Em chords use the EDCAG cadence, so you'll need to start with a first position Em, then 2nd position D minor shape (moves up 3 frets), then a C minor shape(difficult but doable), then an A minor shape, and lastly, a G minor shape (also difficult, but doable.) If you can visualize what all of these shapes look like when you try to play them in the first position, you will be able to figure out how to finger them up the fingerboard in other keys.What about 7th Chords?
The best way to apply 7th chords in the CAGED framework is to simply use them in each of the 5 chord shapes. This is useful for blues and jazz, because the D shape is easily changed from D to Dmaj7, Dmin7, D7, etc., even a Diminished chord that is also portable up and down the fingerboard.What about your right hand?
Glad you asked. A great way to integrate your fretting and picking hands is to practice using TITM (Thumb, Index, Thumb, Middle). And I mean practice. Each of the 5 CAGED shapes responds very well to this plucking order, once you figure out what the root note is. Simply play TITM beginning with the root. So if it is a C shape in the first position, you would pluck TITM on the 5th, 3rd, 4th, and then 2nd strings. To give things some bounce, try alternating the first thumb strke on the root with the 5th or 3rd note of the chord, either above or below the root.The Roadblocks
CAGED theory is pretty straightforward once you figure out how it works. But you may think you'll never get used to applying it. It is physically demanding to refocus how your fretting hand works, especially if you have always played with the front of your hand, like a rock and roller. Don't let the clumsiness of your hands defeat you, it's a natural part of the process of learning CAGED. Part of the difficulty you will encounter is moving consistently, quickly and smoothly from shape to shape. The secret is to go from the first shape of whatever key you are in to the next shape by swapping your pinky or ring finger for your index finger, which covers the root note of the chord you are playing. For example, C shape uses P, M, R (with back of the hand approach). To play the 2nd shape of C, which is A, you would play the same root, but swap fingers (to your Index finger) so that you can play the A shape. Look for linkage between the shapes...it's there, really!Give it some time, and don't dilute it. Play it over and over until it sticks. Play through each shape and change without looking at your hands. Use your ears and just remember what key you're in. That's 5 shapes of a chord in every key, using the back of your hand approach as in the picture. And when you think you've got the cadences pretty well licked, try using a metronome to smooth out your timing.
Then use the 5 shapes to improvise a well-known melody, such as Somewhere Over The Rainbow, Amazing Grace, the Star Spangled Banner, Jingle Bells or Silent Night, etc. If you can wrest a chord melody out of the shapes you're playing, you can consider yourself a CAGED graduate with a bright future on the guitar. How long until you achieve CAGED nirvana? Pay attention to the method until it disappears, and it'll be exactly that long. You're most welcome. Now go have some fun!One final note: I am a lefty player and the cadence picture has been reversed to look like a righty fingerboard to avoid further confusion. I hope the method works for you as well as it does for me! Visit my music page! (Disclaimer: my musical ability has nothing to do with how well CAGED can work for you. Your mileage may vary considerably.)
Thanks for visiting. And thanks for bookmarking this page (Delicious and Stumbleupon) and telling your picker friends! If you find the content here valuable or worthless, please leave some feedback to make it better for the next picker who visits, thanks!
©1987-2007 Jay Toups. Please feel free to use this material yourself and share it with friends. All commercial rights reserved.
Labels: caged, chord melody, fingerstyle, guitar, improvisation, method
:: Jay 10:15 AM [+] Comments? :: 14 comments
...

14 Comments:
This is excellent, thanks!
By Anonymous, at 10:58 AM
wow, I've worked with the CAGED system before and it was the same thing over and over again as before, more repitition and memorization... Somehow the way you explained it just clicks with me perfectly with how I've come to understand the guitar understanding not just memorize this, and I'm gonna spend a lot of quality time with my guitar tomorrow. Thanks I've already sent this to some friends of mine who will love this.
By Anonymous, at 10:40 PM
Thanks for your message Stan. Good questions throughout, and I've replied within your message below.
----- Original Message -----
From: Stan Seko
To: jay@jaytoups.com
Sent: Thursday, September 07, 2006 1:24 AM
Subject: Question re: CAGED
Hello Jay,
Thanks so much for sharing your thoughts on CAGED. I've looked everywhere on the web and I can't find out how to apply the CAGED concept,, but yours is the closest I've found on how to use CAGED, practically speaking, but I'm still not getting it so I thought I'd ask for some help. I use the guitar for vocal accompaniment, not solo chord melody style.
Correct me if I'm wrong but knowing CAGED shapes would only apply to the chord that I am playing at the moment during a song's chord progression. But to my mind, this chord may be only one or two measures long and then the song moves onto another chord, and I assume 5 more CAGED shapes.
Do I just grab the nearest CAGED shape for whatever the new chord is depending on where I am on the fretboard? Or do I choose depending on other factors like bass notes or chord inversion, or wanting a specific chord melody?
How about all of the above? :-) Think of the 5 shapes as alternate voicings to first position chords; this will help you choose and apply them on the fly/as needed. Basically you can use them anytime in a progression. But since you have more facility with first position shapes, using alternate chord shapes will be harder initially because they're less familiar and may break your timing for a while...this is where most players either commit to learning and integrating the shapes or simply give up and return to first position playing.
Seems to me that if I use the guitar as an accompaniment instrument and I'm all over the fret board using CAGED, the more I need to concern myself with a counter chord melody that might interfere with my singing, whereas if I just stay in, say first position, the chords stay in the background and won't compete with my singing. I hope this is clear.
This is a good assumption; most songs focus on the lyrics and rely on backup played in the first position. But once you have the 5 chord shapes in your hands you can begin to use them to add variety, depth and interest to a song's quieter parts, etc. CAGED is superb for chord substitutions that give color to the normal first position chords; for example, a song progression in G - C - D could use first position G, C, and then use a C shape of D as a substitute. It has nice open tones that sound like an open/altered tuning. In the key of E7, you can use a D7 shape instead, which can then easily be turned into a diminished chord for turnarounds, and the D7 shape of E7 supports bluesy walking bass lines, etc.
And if I know where all the scale notes are that weave around each of the 5 CAGED shapes, again, how does this fit in practically speaking?
You can rely on the shapes to give you improvisational power that is otherwise hard to come by. Most singers aren't very adept at winging it for solos, breaks, etc. CAGED shapes make it easier to be spontaneous because playing through diatonic major and minor scales is "at hand" and can be initiated from within the context of the chords/key shapes you're using.
When you're singing, instead of both singing and playing the root note of a particular chord you could use the third, (or fourth or fifth) note and get a nice harmony note instead of simply duplicating the note you happen to be singing. Or you could sing scat either with or above the melodic phrase you and have a built in harmony that is easy to find and rely on to support vocalizations once you get the hang of it. Try harmonizing a major scale by leading with the 3rd tone "Mi" of the scale on the guitar and root "Do" for your voice. It's fun and trains the ear and hands to work together to create something neither can do alone.
Basically CAGED presents a ton of options which can be confusing to put to good use initially. But that's the fun/learning part too. You have 5 options for every chord instead of one or two. This plethora of choices almost always results in a more robust playing style. And first position is just the springboard instead of a dead end as it is for players who haven't figured it all out.
Another good thing to try would be thinking of CAGED shapes as movable 'capoed' versions of chordal arrangements you already know. But instead of using a capo you simply use the shapes up the neck without it. Take a song you already know and rearrange it to use new shapes and see how it sounds. Sometimes a song in G first position sounds better if you choose an alternate shape, such as D at the 7th fret. Combining the first position shapes with the same progression played in alternate shapes can help your backup playing sound like two players, one in first position and the other up the neck, as in rhythm and lead situations.
CAGED is harder for flatpick players because the shapes are harder to play accurately. If you fingerpick however you can "pinch" the 3, 4, 5 or 6 notes in a shape and emphasize the triads and intervals within the shape to good effect. One instrumental that I teach students is The Star Spangled Banner. It cannot be played solely in the first position because the melody goes up beyond it. The only way to figure it out is to notate the melody and then play those melody notes within the chord shapes up the neck. Try it in the key of G. You have to go to the D shape of G to get the "Oh say can you see..." so it is a great ice breaker for using the method. Or it will frustrate you to no end if you're not using the shapes to get all of the notes of the melody in. All the notes occur within the 5 shapes and it is well worth the time and energy to figure out how to play it. Once you can do this, then you can apply the same approach to other common instrumental melodies, i.e., Over the Rainbow, Silent Night, Jingle Bells, When You Wish Upon a Star, etc., etc.
I sure would appreciate it if you could clear this up for me.
Please don't hesitate to write or comment again if there's anything else I can explain. But I think you are on the right track. Just give it time and look for logical ways to invoke new shapes. Since you probably have a lot of time in first position playing, it may seem like an uphill battle but it will slowly and surely salt its way into your playing and give you much more facility, not to mention fun and excitement as you wing it like a trapeze artist. Not many singers do that. - Jay
Sincerely,
Stan
Sacramento, CA
By Jay, at 9:45 AM
Ok, mabey I missed something, but I was really starting to get it until in the pictures I could no longer see the nut end of the guitar/fretboard.At this point, I am wondering exactly where you are positioned on the guitar.It was easy to tell for the first two positions, then I lost site.Are you moving up two frets everytime or.......
Thanks
Shane
By Anonymous, at 10:23 PM
Hi Shane,
In the C cadence, the shapes happen on fret numbers as follows:
3rd (1st position of C), 3rd (2nd pos. of C or the "A" shape, 8th (3rd pos. of C, the "G" shape, 8th (4th position of C, or "E" shape, and finally frets 10th-13th for the "D" shape of C.
Once you figure out the "spans" between the shapes it is relatively simple to transpose CAGED to any sequence and any key.
Happy hunting, let me know if you have any more questions and thanks for the input. I'll adjust the pics to make this clearer.
By Jay, at 10:56 PM
Hello Jay,
Thanks for all the help. You've given me a lifetime worth of homework, but at least I'm back on track. I see now that CAGED is a 12 fret chord where one can pick and choose depending on the circumstance. And I guess recognizing circumstances is where experience become important. I'll work on this. Thanks a whole lot.
Stan (reposted from e-mail)
By Anonymous, at 10:58 PM
I can only say thank you. I have been searching for how to make some sense out of the CAGED theory. Your format gives me a great understand of how to use it and how to locate the root of the CAGED shape that I am using. Thanks for putting it together for me.
By Anonymous, at 9:35 AM
Great stuff! It's helped me work through my Noad book a little better. However, can you make the pics a little larger. Old eyes have a tough time seeing :D
By spunk, at 9:25 PM
LOVE the page... thanks so much.. I too would like to concur with a previous poster that I would like the pictures a little larger.
Thanks so much for taking the time to put this all down.
By DJK, at 2:09 PM
djk, thanks for visiting and glad you found some value here. I've inc'd the size of the first pic and put a bit more 'storyline' to help make it easier to understand. (Oh yes, and see!)
By Jay, at 5:46 PM
Bryson (tbryson@XXXXXXX.net)
to jay
Hey man,
I was born and raised in Santa Barbara, Ca. and in my teens (late 70's)I took guitar lessons from a man named Bill Thrasher. Bill was an incredible guy: awesome guitar player, artist, teacher, way
cool hang, etc., and I feel very fortunate to have known him.
As far as I know, he came up with the C-A-G-E-D thing, though certainly others could have come with it on their own as well.
Bill wrote a guitar method book with Joe Pass where the CAGED theory was "introduced".
By the time I had met Bill, he and Joe were no longer friends.
He didn't like to talk about it much, but from what I gathered, there was resentment over that fact that Joe had taken credit for some of Bill's work.
I still have somewhere (that's a big somewhere) a stack of lesson sheets from Bill. The next time I run across them I'll scan the c-a-g-e-d stuff for you.
Take care,
Timmy
By Anonymous, at 7:43 AM
Hey Jay,
I am curious about how CAGED relates to barr chords. Perhaps you could explain that. I don't think they're the same, but I'm not sure. I am especially glad that I am not so far along that I'm hooked on the first position voicings. I am eager to learn and every bit of help is welcomed. Peace.
Isaac in Fresno, CA
By Isaac, at 9:55 PM
Isaac,
CAGED and barre chords are one in the same essentially. Any chord can be voice as open and then as barred as it moves up or down the neck through the 5 positions.
For example, the first position C chord is an "open" chord, just 3 fretted notes. The second voicing requires a full (5 or 6 string) barre to provide the root note (and optional 5th note below the root) for the "A" shape of C. Take a look at the picture again (2nd frame from right).
Another example:
First position G chord is open, with just 3 fretted notes. Second position G chord is in E shape and is barred at the 3rd fret, encapsulating the E shape.
Another example:
First position A chord. 3 fretted notes, and at least one open note, the A string.
The 3rd (cAGEd) position of the A chord is also a barred E shape, played from frets 5-7.
You will find that playing a first position E chord with the back of the hand and then using the index finger as the barre (or movable nut, lol)makes it very easy to use in other keys (the shape recurs in all other keys...)
A shapes do the same thing, as do D shapes.
After a while it comes into focus. Just remember that each major key has only 5 basic shapes: CAGED. The only difference being which key you're playing in and which position you're starting with. So, if you have a song in key of G, start at open G and the next shape (voice) would be a barred E shape of G, then a 4-note D shape, then a 5-note C shape, and finally a barred A shape of G from frets 10-12.
Voila...the CAGED circle...it is easy once you get the hang of it.
Sorry if this is convoluted and text heavy. One of these days I'm going to make a video...;-)
By Jay, at 10:15 PM
Excellent page. Thank you for taking the time to fully explain this. I've been playing for 18 years and this is something that I've never fully applied. I'm planning on changing that now.
By Darren, at 1:18 AM
Post a Comment
<< Home